We will be taking a series of portraits and a series of textures and landscapes to combine into a single double-exposure image. The term "double exposure" refers to the old days of film, where a photo would sometimes contain 2 exposures.
Thursday, April 6, 2017
Tuesday, April 4, 2017
Check yourself!
So far for 4th Quarter, you should have...
1. Pen tool sports collage with at least 5 figures (30)
2. Jake Waldo (10 pts)
3. Retouching folder with (10 pts each)
-Nose job guy
-Your own face
-2 girls
-Nose job girl
4. Illusion contact sheet and best photo (30)
1. Pen tool sports collage with at least 5 figures (30)
2. Jake Waldo (10 pts)
3. Retouching folder with (10 pts each)
-Nose job guy
-Your own face
-2 girls
-Nose job girl
4. Illusion contact sheet and best photo (30)
Monday, April 3, 2017
Awesome, gravity defying illusions are underway.
By the end of today: You will have at least 10 shots of experimenting
Tomorrow: You EDIT your best 4
You will turn in: a contact sheet of the best 4 and 1 BEST PHOTO
What makes an illusion good?
-Good lighting (model is NOT super dark as a result of backlighting)
-Creative pose
-Pose done properly (so the illusion looks real)
-Cropping any excessive space
-Doing your levels to boost contrast and color
Tuesday, March 28, 2017
Make Fun of Jake Day
Once a year, we have a different challenge to do something with my boyfriend's face. Then all of his students get to see it and enjoy the best of your Photoshop pieces. This year, we are trying to hide Jake's face for a Where's Waldo challenge- his students will actually have to find his face in a crowd or famous image. It will take your clever Photoshop skills to make it clever and difficult.
Tricks:
-Search source files on LARGE for high quality
-Use Image-->Adjustments--> brightness/contrast or levels to make the values of the source image match the face
-CTRL + J objects in the foreground to overlap the face and hide it if necessary
-Don't underestimate black and white. It can be challenging!
Source images and examples:
Tricks:
-Search source files on LARGE for high quality
-Use Image-->Adjustments--> brightness/contrast or levels to make the values of the source image match the face
-CTRL + J objects in the foreground to overlap the face and hide it if necessary
-Don't underestimate black and white. It can be challenging!
Source images and examples:
Monday, March 27, 2017
Hello everyone, I apologize for the absence.
I would like you to not only finish ALL of the retouching challenges we tried, but also create a new challenge by trying a tanned skin tone on your models. You can find the step by step instructions on the M drive, at the end of the retouching document provided. So far, you have only submitted a portion of your facial retouching abilities to me. By tomorrow I would like you to have at least 2 models you have tried this technique on, among others. if you finish early, you can do work from another class or do extra photos for extra credit.
Friday, March 24, 2017
Thursday, March 16, 2017
Pen Tool sports collage
Sunday, March 12, 2017
Pen tool sports collage
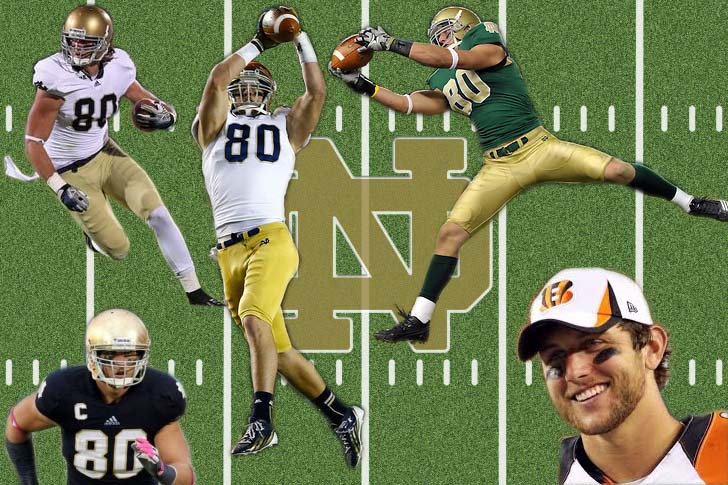
You will be creating an homage to an athlete from your favorite sport using pen tool. We have used pen tool before, but many people are reluctant to use this powerful tool because it takes a little extra time. Unfortunately, pen tool usually gives you the best results when cutting an object, giving you complete control and smooth edges.
You have 3 days to do this, so take your time and make it look good.
1. Think about your favorite sport. If you're not into sports, pick a sport you find visually appealing. It can be anything! I have had people use tennis, ballet, running, martial arts, etc.
2. In photoshop, click File-->New and create a document that is 10" wide by 8" tall, 300 resolution.
3. Using Google image search, click TOOLS and modify the SIZE filter to LARGE.
This will give you the highest quality images.
4. Find high quality images of your selected athlete. Copy and paste the photo into your new document in Photoshop.
5. Click on the pen tool. Zoom in on your athlete so you can see the details very clearly. I tell you to zoom in so you can do a precise job with the pen tool.
6. Click to connect a path of dots around the outside of your athlete.
7. Once you have completed your path, right click and click "make selection". This tutorial says you can also click CTRL+ENTER to get your marching ants.
8. Once you have ants around the outside of your athlete, you can click CTRL+J to copy a fresh, trimmed up version of your athlete into a new layer.
9. Discard the old athlete layer once you have your trimmed one.
10. Repeat this process until you have your athlete 5-7 different ways. Arrange them nicely so they overlap and make a nice composition. The athletes should have perfect, smooth edges. If you try to short cut using quick select, I will know.
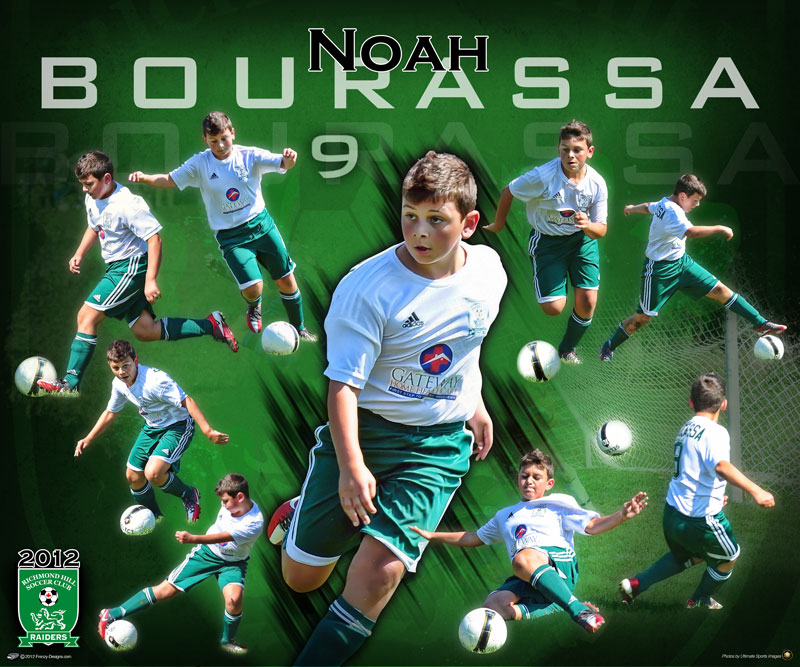
This example is a different size/shape than yours, but the figures are still arranged nicely, so you get the idea. (I do not have access to my past examples to show you the proper ones!)
Here are some posters with a concept similar to yours
You have 3 days to do this, so take your time and make it look good.
1. Think about your favorite sport. If you're not into sports, pick a sport you find visually appealing. It can be anything! I have had people use tennis, ballet, running, martial arts, etc.
2. In photoshop, click File-->New and create a document that is 10" wide by 8" tall, 300 resolution.
3. Using Google image search, click TOOLS and modify the SIZE filter to LARGE.
This will give you the highest quality images.
4. Find high quality images of your selected athlete. Copy and paste the photo into your new document in Photoshop.
5. Click on the pen tool. Zoom in on your athlete so you can see the details very clearly. I tell you to zoom in so you can do a precise job with the pen tool.
6. Click to connect a path of dots around the outside of your athlete.
7. Once you have completed your path, right click and click "make selection". This tutorial says you can also click CTRL+ENTER to get your marching ants.
8. Once you have ants around the outside of your athlete, you can click CTRL+J to copy a fresh, trimmed up version of your athlete into a new layer.
9. Discard the old athlete layer once you have your trimmed one.
10. Repeat this process until you have your athlete 5-7 different ways. Arrange them nicely so they overlap and make a nice composition. The athletes should have perfect, smooth edges. If you try to short cut using quick select, I will know.
This example is a different size/shape than yours, but the figures are still arranged nicely, so you get the idea. (I do not have access to my past examples to show you the proper ones!)
Here are some posters with a concept similar to yours
11. Finally, create an interesting background- whether you choose to use text like the Chicago bulls example above, or a custom gradient of your team's colors using this tutorial. Scroll down to where it says "The presets area" to begin.
If it works with your background, you can add drop shadows to your figures.
I WILL MAKE TURN IN FOLDERS ON THURSDAY when I return. Plan on having this finished by then.
If you finish early, here are a couple links to some interesting tutorials to try:
Friday, March 10, 2017
MACRO DUE!
Edgar Amador
Ashlee Jurevich
Bailey Vandergriff
Here are a sample of some beautiful flower macros I have seen in the classroom. Well done- to everyone- everyone has some shots that REALLY stand out, and I cannot wait to show these at the Turlock Public library in MAY!
MACRO CONTACT SHEET (30 pts) AND BEST PHOTO (10 pts) DUE TODAY. What I upload off the servers today is IT. I will be out of town, far far away from the school servers, and will not have access to your files. Also, ALL EXTRA CREDIT FOR Q3 IS DUE TODAY. Again, if it's not in the folder by 3pm, I will not upload it to my Google drive, and I will not see it.
Contact sheets are 3 COLUMNS and 5 ROWS. Make sure the rest of the boxes stay default- 8x10 300 resolution. The contact sheet should look like this (Thanks, Adelo!):
Monday, March 6, 2017
This photo is proof that you don't have to HAVE a pretty background to make it look like you do. It depends on your camera angle. You must learn to point the lens in the direction that shows the most pleasing little piece of a background.
In this case, the photographer has an alleyway full of weeds, and he makes it work. I want you to experiment with angles in your macro shots, and if you have to include the background, make sure it is pleasing. We don't want to see things like fire hydrants, bathrooms, trash cans, cars, etc.
Take at least 3 different angles of each photo. Then you will have more options when you return to the classroom!
Here are the lists for those people catching up at home:
In this case, the photographer has an alleyway full of weeds, and he makes it work. I want you to experiment with angles in your macro shots, and if you have to include the background, make sure it is pleasing. We don't want to see things like fire hydrants, bathrooms, trash cans, cars, etc.
Take at least 3 different angles of each photo. Then you will have more options when you return to the classroom!
Here are the lists for those people catching up at home:
Subscribe to:
Posts (Atom)